
Serverless computing is increasingly getting popular because of the unmatched advantages such as low operational cost and faster development pace. Thanks to serverless computing developers can concentrate more on their code without regular worries corresponding to the development and maintenance of servers.
Amazon Web Services (AWS) now came with a powerful serverless computing service called AWS Amplify helping web app developers to utilize the environment to the best of their advantages. The React Native and ReactJS developers will be particularly delighted with the service as they need to spend a hell lot of time setting up the backend server for the project.
As the whole efforts and pains of setting up the backend server have been taken away by the serverless computing solution, the developers in any React development company now can concentrate more on the app codebase. The relief from the worry and pain of server-side management and operation is a great value addition from the AWS Amplify.
If setting up this serverless computing solution is really easy and it doesn’t require you to hire AWS developer. To help you complete the set up easily here we are going to explain the entire process. But before that we have to share a few words on the definition and the key concept of the AWS Amplify.
What is AWS Amplify?
Amazon Web Services is already well-known and popular all over the globe as the new platform for commercial cloud service offerings. Some of the notable and sought after AWS services include web hosting, cloud storage, a range of cloud database technologies and serverless computing applications that can be utilized for both mobile and web apps across the niches.
When it comes to serverless computing, React already enjoys an advantage with the bootstrapping of an app using Expo and similar tools. But, setting up the serverless environment may not be too easy and it involves a few stumbling blocks. Writing the code for a backend service and maintaining it can be really challenging for many reasons.
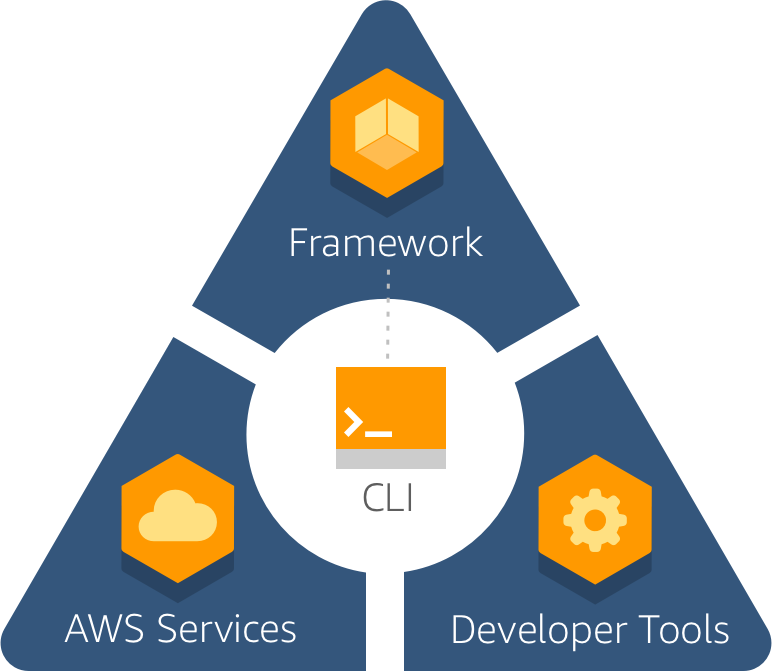
To help JavaScript developers glide through this process of setting up a serverless environment, AWS now has come with a project named AWS Amplify. This basically helps to embed a cloud service and provides a detailed architecture to implement a serverless environment. The API of the AWS Amplify comes with an extensive feature set including the following.
- User Authentication
- GraphQL Client provided as an API. For the majority of use-cases AWS AppSync comes with features for both real-time and offline access.
- Push Notification messages
- Interactions through conversational bots
- Cloud storage support
- Internationalization
How to Get Started with AWS Amplify?
AWS Amplify comes as a fully equipped library allowing access to all kinds of tools required for developing serverless applications. Thanks to AWS Amplify, the job of integrating multiple AWS services with the respective app becomes easier as this integration only requires using just a few code lines. Moreover, to accelerate the pace of development pace Amplify also provides an array of usable UI components.
As the very first step you need to open an AWS account so that you can get access to any of the AWS services and the AWS Amplify library for implementing a serverless environment. After signing up you easily get access to all the AWS services provided under the free plan.
Install and Configure the Amplify CLI
Now, you need to make the AWS services ready for your specific app requirements. This is done by the Amplify CLI tool allowing the developers to configure specific AWS services for the app project in hand. This CLI tool is there to guide you through the development process and make the mobile and web app development process easier. The CLI tool of the AWS Amplify basically works by utilizing several nested stacks and AWS CloudFormation. Thanks to this tool you can configure and bring changes in the app locally before really making the changes and updates available on the cloud.
For using the CLI you require Node.js version 8.11 or more recent version and npm version 5 or more recent ones. When these two are installed in the system you are ready to use the CLI tool. You can just get both of them from the Node.js download page in case you have not already installed both of them in your system.
Now, it is time to install the Amplify CLI tool by just running in the command line npm install -g @aws-amplify/cli. According to experts, it is advisable to avoid using yarn for installing the CLI as the option comes with a lot of problems. As soon as you have finished installing the Amplify CLI, developers need to configure the tool as per the region of use and specific user credentials.
Building the React App
Now after you have finished configuring the Amplify CLI you can just start building the React app in a few steps. It is advisable to bootstrap the React app project to ensure focusing on the code instead of worrying over things like setting up Babel and Webpack.
To start with the React app project, run the command line, $ npx create-react-app serverless-react. By this you have got a serverless-react folder comprising all required React app files. Now you can start the Amplify project by following the steps below.
Run cd serverless-react in the command line to switch project directory. Now a prompt with some questions will appear and you have to answer them or make some choices.
You have to choose the preferred code editor here. Now another prompt will ask you questions about what type of app you are developing. Here choose JavaScript followed by React. For the remaining prompts choose the default values and you are almost done.
Now in the cloud all the resources for the deployment are set by the amplifying init command. With Cloud Formation stacks you can now run the project for Amplify. All the chosen configuration attributes corresponding to the resources are incorporated into the directory of the project.
As the conclusive step you have to bring in the Amplify library to the project. The library coming loaded with various modules and UI components makes integrating AWS services an easy job needing only a few code lines.
Conclusion
When going serverless is the trend for the vast majority of web and mobile apps, the AWS Amplify support for React app development projects comes as a great help. If as a React developer you need to utilize serverless computing advantages for an app, there is not a better option than AWS Amplify.