
Though the concept of augmented reality predates the original Android phone, Google Glass has helped popularise the phrase in recent years. In 2021, the augmented reality (AR) market for mobile devices was estimated to be worth US$12.45 billion. It is anticipated that by 2026, this addressable market will surpass US$ 36 billion.
It might be challenging to navigate the augmented reality app market on Android devices. To make your path to app creation easier, we’ve spent a good deal of time delving into the nuances of augmented reality technology.
Ready to guide you through the process, our well-honed tips and tricks will assist you in selecting the appropriate tools and enhancing your app with interactive elements. Prepare to combine pixels.
With smartphones, tablets, and other mobile devices falling into this category, there are a tonne of prospects to build an Augmented Reality (AR) app. For all your web and mobile app development needs, get in touch with CMARIX today.
What is Augmented Reality?
The fascinating new technology known as augmented reality (AR) improves our perception and interaction with reality by superimposing digital information over the real world. In this tutorial, we’ll use Android Studio to construct a simple augmented reality app that uses the device’s camera to display a 3D item in the actual environment.
Our highly creative minds at CMARIX live in the wild and come up with even wilder ideas. He approached me one day with this conversation regarding surface object detection. It was among the most amazing things we ever saw. Eventually, we decided to make it real.
How Does Mobile Augmented Reality Work?
Hire Android app developers who can create robust AR apps for your business. Mobile apps can employ one of two main types of augmented reality. The fundamental idea behind them all is the same, even though each one uses a different set of sensors and technology to show virtual 3D objects over a view from the camera.
Is Augmented Reality Supported by Android?
You may create an AR app for Android and publish it on the Google Play Store. Not all devices, though, can enable augmented reality. Through its ARCore Android studio project, Google certifies whether devices are equipped for augmented reality. To make sure it functions as intended, it evaluates the camera, motion sensors, and design architecture of the gadget.
For the device to provide good performance and efficient real-time calculations, the CPU must also be strong enough to integrate with the hardware architecture.
Android 7.0 Nougat or later must be loaded with Google Play Services for AR on Android devices that are compatible with augmented reality. Users will be requested to install it if it isn’t already using augmented reality apps to their full potential.
What are the Prerequisites for Creating an AR App on Android?
There are multiple software development kits to be used to integrate AR into your app. However, the following prerequisites are crucial to follow before developing an Android app with AR.
Prerequisites
To follow along, ensure you have the following:
- Android Studio is installed on your system.
- Basic knowledge of Java and Android development.
Getting Started
First, clone or download the project from the GitHub repository: Simple-ARApp.
Understanding the Code
Open the project in Android Studio and explore the code structure. Here’s a brief overview:
MainActivity.java
This file contains the main logic of our AR app. It initializes the ARFragment and sets up the 3D model to be displayed.
// MainActivity.java
import android.net.Uri;
import android.os.Bundle;
import android.view.MotionEvent;
import android.widget.Toast;
import androidx.appcompat.app.AppCompatActivity;
import com.google.ar.core.Anchor;
import com.google.ar.core.HitResult;
import com.google.ar.core.Plane;
import com.google.ar.sceneform.AnchorNode;
import com.google.ar.sceneform.rendering.ModelRenderable;
import com.google.ar.sceneform.ux.ArFragment;
import com.google.ar.sceneform.ux.TransformableNode;
public class MainActivity extends AppCompatActivity { private ArFragment arFragment; @Override protected void onCreate(Bundle savedInstanceState) { super.onCreate(savedInstanceState); setContentView(R.layout.activity_main); // Initialize ARFragment arFragment = (ArFragment) getSupportFragmentManager().findFragmentById(R.id.arFragment); // Set listener for tap events on AR planes arFragment.setOnTapArPlaneListener( (HitResult hitResult, Plane plane, MotionEvent motionEvent) -> { if (plane.getType() != Plane.Type.HORIZONTAL_UPWARD_FACING) { return; } // Load 3D model when a tap occurs loadModel(); } ); } private void loadModel() { // Load 3D model asynchronously ModelRenderable.builder() .setSource(this, Uri.parse("model.sfb")) .build() .thenAccept(modelRenderable -> { // Add model to the scene placeModel(modelRenderable); }) .exceptionally(throwable -> { // Handle model loading error Toast.makeText(this, "Error loading model", Toast.LENGTH_SHORT).show(); return null; }); } private void placeModel(ModelRenderable modelRenderable) { // Create an anchor at the center of the screen Anchor anchor = arFragment.getArSceneView().getSession().createAnchor(arFragment.getArSceneView().getScene().getCamera().getPose()); // Create AnchorNode to attach the model to AnchorNode anchorNode = new AnchorNode(anchor); anchorNode.setParent(arFragment.getArSceneView().getScene()); // Create TransformableNode to allow user interaction with the model TransformableNode model = new TransformableNode(arFragment.getTransformationSystem()); model.setParent(anchorNode); model.setRenderable(modelRenderable); model.select(); }
}
In this revised version, I’ve concentrated on the AR-specific code:
Set Tap Listener: We set an OnTapArPlaneListener to listen for taps on detected AR planes (flat surfaces). When a tap occurs on a horizontal upward-facing plane, we initiate the loading of the 3D model.
Load 3D Model: The loadModel() method loads the 3D model asynchronously using the ModelRenderable.builder(). It listens for successful model loading and handles any exceptions that may occur.
Place Model: Once the model is loaded successfully, the placeModel() method creates an anchor at the center of the screen (where the user tapped). It then attaches the model to an AnchorNode and allows user interaction with the model by creating a TransformableNode.

This code efficiently handles the AR functionality of the app, ensuring that the 3D model is loaded and displayed correctly when the user interacts with the AR scene.
activity_main.xml
This XML layout file defines the layout for our MainActivity. It includes an ARFragment for displaying the AR scene.
<!-- activity_main.xml -->
<?xml version="1.0" encoding="utf-8"?>
<RelativeLayout xmlns:android="http://schemas.android.com/apk/res/android" xmlns:app="http://schemas.android.com/apk/res-auto" xmlns:tools="http://schemas.android.com/tools" android:layout_width="match_parent" android:layout_height="match_parent" tools:context=".MainActivity"> <fragment android:id="@+id/arFragment" android:name="com.google.ar.sceneform.ux.ArFragment" android:layout_width="match_parent" android:layout_height="match_parent" />
</RelativeLayout>
Running the App
Now that you’ve reviewed the code, let’s run the app on a device or emulator.
- Connect your Android device to your computer or launch an emulator.
- Build and run the project in Android Studio.
- Once the app is installed and launched, point your device’s camera towards a flat surface.
- Tap on the screen to place the 3D model onto the detected surface. Check below a video that represents the 3D model of an object on the surface created by CMARIX.
How Can I Create Android Augmented Reality Apps?
Multiple processes are involved in creating Android Augmented Reality apps, but here’s a simple tutorial to get you started:
Choose a Development Framework: to choose the right Android development services, you need to pick a good AR framework to build an app. ARCore and Unreal Engine are popular choices.
Install Development Tools: Before you begin developing an Augmented Reality app, make sure you install the required development tools. Development environments, libraries, and APIs for Android are some of these tools.
Plan Your App: Plan out the design of your augmented reality app, taking into account fundamental elements like user experience and AR interactions. Choose the functionalities and features you wish to include in your app.
Choose Your Development Team: The development team then steps in. Using the selected framework and development tools, start developing your augmented reality application.
Test Your App: Conduct a comprehensive test of your augmented reality app across a variety of Android devices to identify any faults and simultaneously fix them.
Enhance Your App: Make sure your augmented reality app is ready for Android users. Verify the user experience, performance, and stability.
Get User Feedback: Gather user feedback and make changes to your augmented reality app based on their recommendations and experiences. Update and tweak your program often to make it more appealing and functional.
Which Software is Used in Augmented Reality?
There are several software development kits (SDKs) available that you can utilize to include augmented reality (AR) into the creation of your apps as it grows in popularity.
Below are some of them:
Google ARCore – It is a toolkit designed by Google that is compatible with Unreal, Unity, and Java/OpenGL. To make virtual items appear natural in their surroundings, it offers motion tracking, environmental comprehension (e.g., identifying horizontal surfaces to position virtual objects on the floor or shelves), and light estimates.
Vuforia-One of the top augmented reality SDKs, Vuforia, can create 3D geometric maps, recognize text, convert static augmented photos into motion videos, and store data locally or in the cloud.
ARToolKit- It is an open-source application development kit. In addition to being free, ARToolKit offers a vast feature set, such as support for both single and dual cameras, smart glasses integration, and GPS support for making location-based applications (like Pokemon Go).
Apple ARKit – 2017 saw the release of Apple ARKit. It has 2D object interaction, high-spec face tracking, an interface with external tools, and Visual Inertial Odometry (VIO), which lets you track environments precisely without the need for extra calibration.
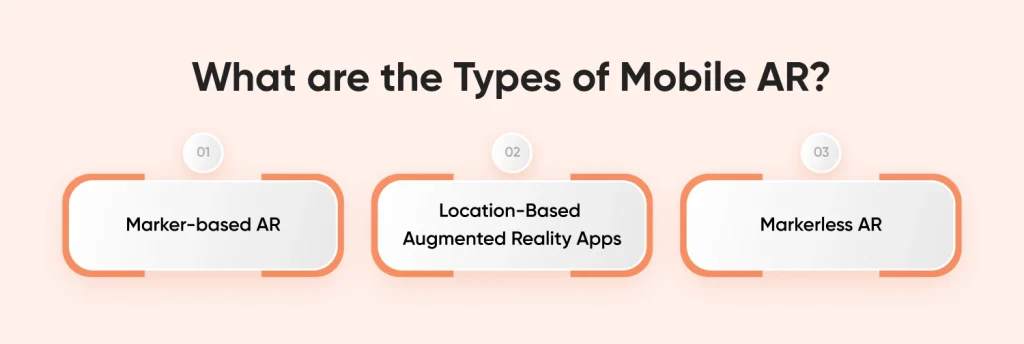
What are the Types of Mobile AR?
Although virtual reality (VR) and augmented reality (AR) are sometimes used synonymously, these two technologies are not the same. Through a headset, users can encounter computer-generated virtual reality (VR) content that lacks the actual world’s visual component.
Some of the most popular forms of mobile augmented reality are listed below to help you better grasp how it usually functions in mobile applications. These might assist you in imagining how you wish to provide your clients with a distinctive mobile experience.
Marker-based AR
Marker-based augmented reality (AR) in mobile apps allows users to overlay virtual things on real-world objects by detecting them. The virtual object disappears when the camera loses track of the marker (for example, when the user moves the phone around); the virtual objects reappear when the marker returns to the camera view. The most common use case for marker-based augmented reality is face filters. To choose where to place the face filters, apps measure the user’s mouth, nose, eyes, and other facial features.
Location-based Augmented Reality apps
These do not need location-based AR markers. To locate virtual objects, they use positional inputs such as GPS. Because it is programmed to be in particular places, the camera scans the real world and shows items. The most well-known augmented reality app that is location-based is called Pokemon Go.
Markerless AR
There are more methods for positioning virtual objects without the usage of markers besides location-based augmented reality. Multiple sensors are used in markerless augmented reality to determine the orientation and position of a mobile device. These sensors come in the following varieties:
- Accelerometer: This sensor calculates how much acceleration the mobile device is subjected to.
- Gyroscope: It calculates the angular velocity in three dimensions along each axis.
- Magnetometer: It gauges the magnetic field’s strength in all directions.
The mobile app’s technology stack and the development team’s experience will be impacted by the kind of augmented reality you intend to include in your concept. It’s also feasible that increasingly complex augmented reality applications will require a combination of marker-based and markerless features.
Conclusion
If you’re feeling scared to take the plunge into augmented reality, keep in mind that technology should be used to support your business goals. Whether you want to increase brand awareness, attract new consumers, close deals, hold their interest for longer, or just improve their overall experience, the augmented reality feature needs to align with your priorities.
We recommend that you take into consideration CMARIX, which has a team of knowledgeable app developers that can work with any AR toolkit, when you’re ready to make technology decisions for your iOS and Android app, whether it’s already available on the market or you’re just getting started. It makes it possible for apps to make the most of the hardware features required for augmented reality to function, including the device’s camera, location support, and movement recognition.