A To-Do List application aids with holistic task management by letting you create, edit, and organize your tasks. Using Strapi for the backend and ReactJS for the frontend, you can build a dynamic, efficient to-do list app. Integrating React with Strapi gives you a powerful, scalable solution for your web development projects.
This guide shows you how to use Strapi with React, but it’s not exhaustive. We won’t cover user authentication, API access control, or full website building with React for web development. If you’re looking for more details, consider exploring more fundamental Strapi examples or ReactJS development services to expand your skills.
To follow this guide, you need to know the fundamentals of:
- ReactJS,
- Strapi, and
- RESTful APIs.
No need for advanced Strapi with React skills. Just make sure NodeJS version 12+ is installed, along with npm or yarn.
What is Strapi?
Strapi is an open-source headless CMS (not based on any preliminary GUI). It lets you build powerful APIs quickly. With Strapi React integration, you can create flexible, dynamic applications. Strapi Frontend is highly customizable, easy to use, and supports RESTful and GraphQL APIs. It’s ideal for managing content without worrying about the frontend—simple yet robust.
Configuring Strapi
First, we create a Strapi app to get started. Admins can use this app to manage backend operations. You can set it up using either npm or yarn:
npm:
npx create-strapi-app todo-list --quickstartyarn:
yarn install global create-strapi-app
yarn create-strapi-app todo-list --quickstart
For yarn version 3 and above:
yarn dlx create-strapi-app todo-list --quickstartAfter finishing creating the app, we run it in development mode. This mode sets up a local server where we can:
- Manipulate data collections
- Create API endpoints
- Configure third-party authentication
- Set up normal authentication
Start development mode by running these commands in the to-do-list folder:
npm:
npm run developyarn:
yarn run developType “http://localhost:1337/admin” in your browser. You’ll see a dashboard where you can set up an admin account.
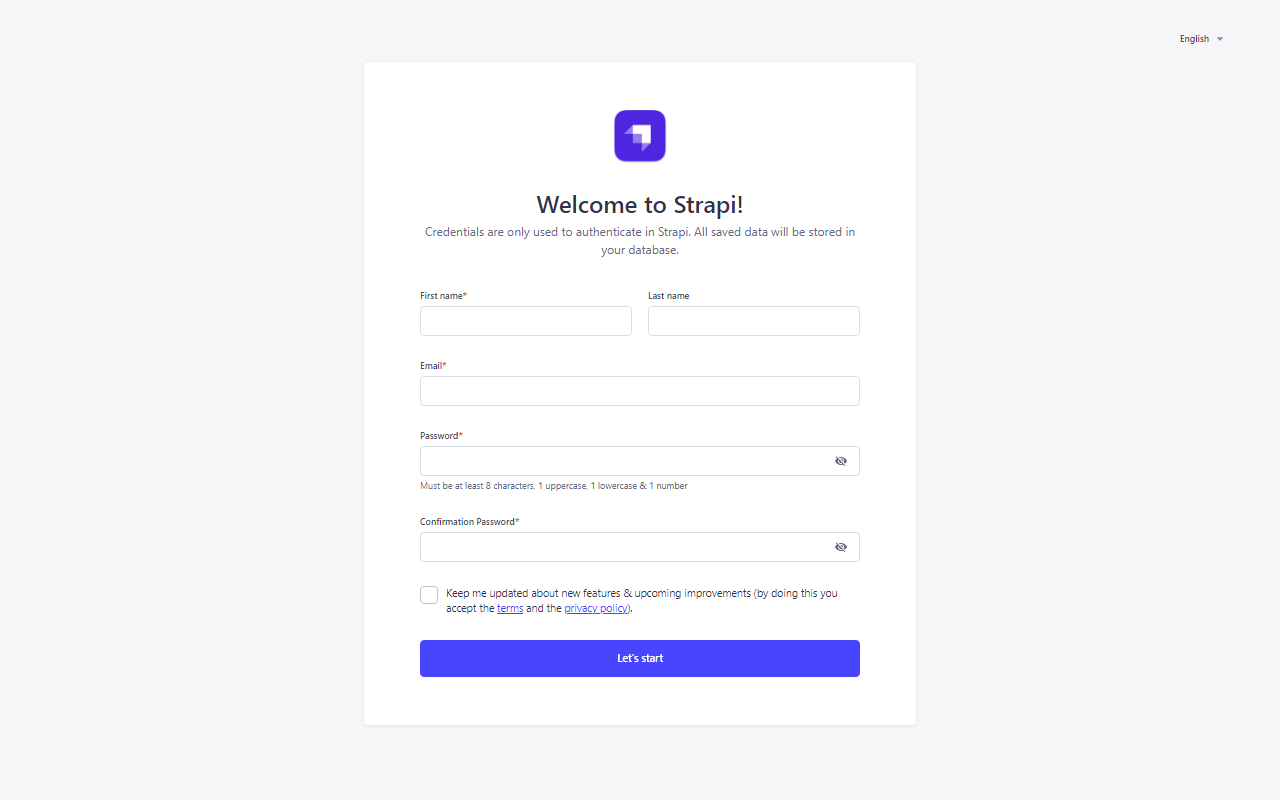
This account grants exclusive access to backend operations, ensuring your app’s security.
Once logged in, the dashboard gives you control over everything. You’ll be able to manage collections, create APIs, and much more with ease.
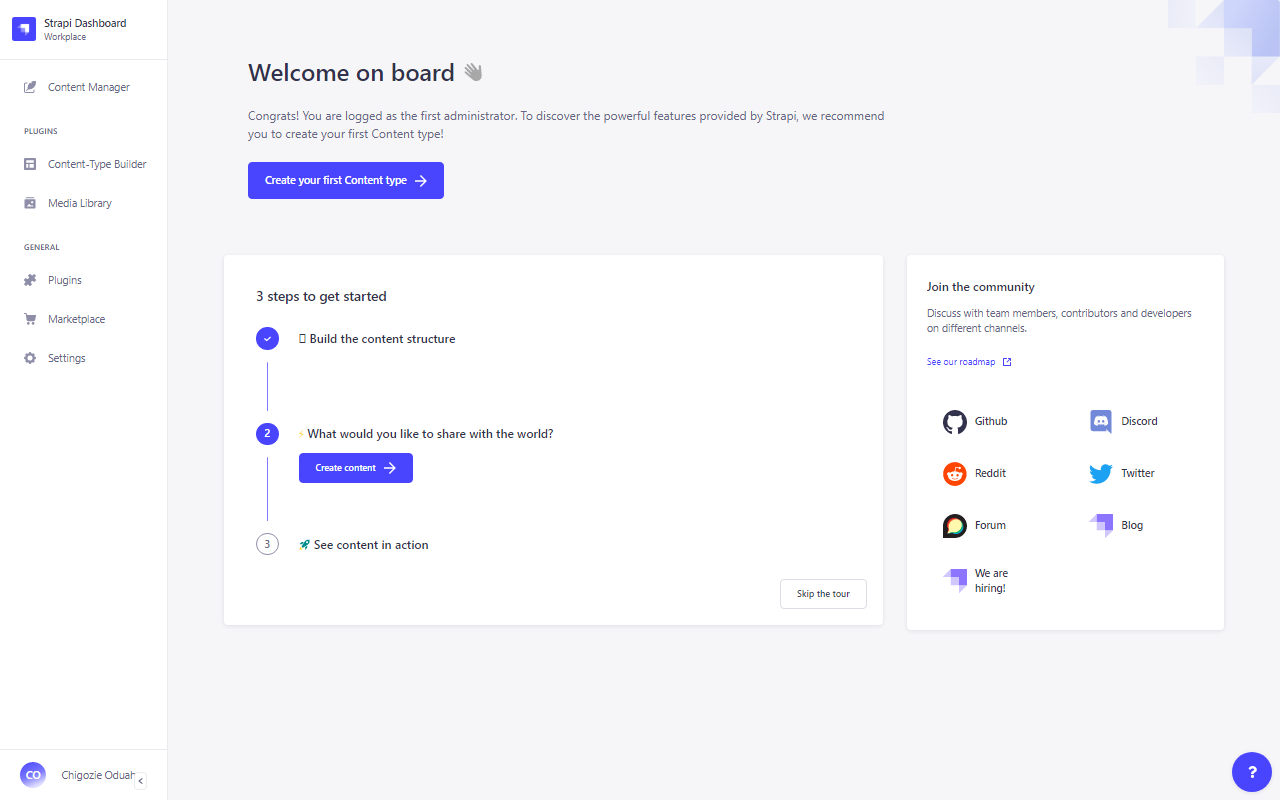

Backend Development
Now, let’s configure the app’s backend. It’s mandatory for data flows within the app. Follow these steps:
Step 1: Create a To-Do Collection
A collection consists of similar data structures. For each collection, Strapi automatically creates an API endpoint. To create our “Todo” collection:
- Go to the Content-Type Builder section under plugins. This is where we build collections.
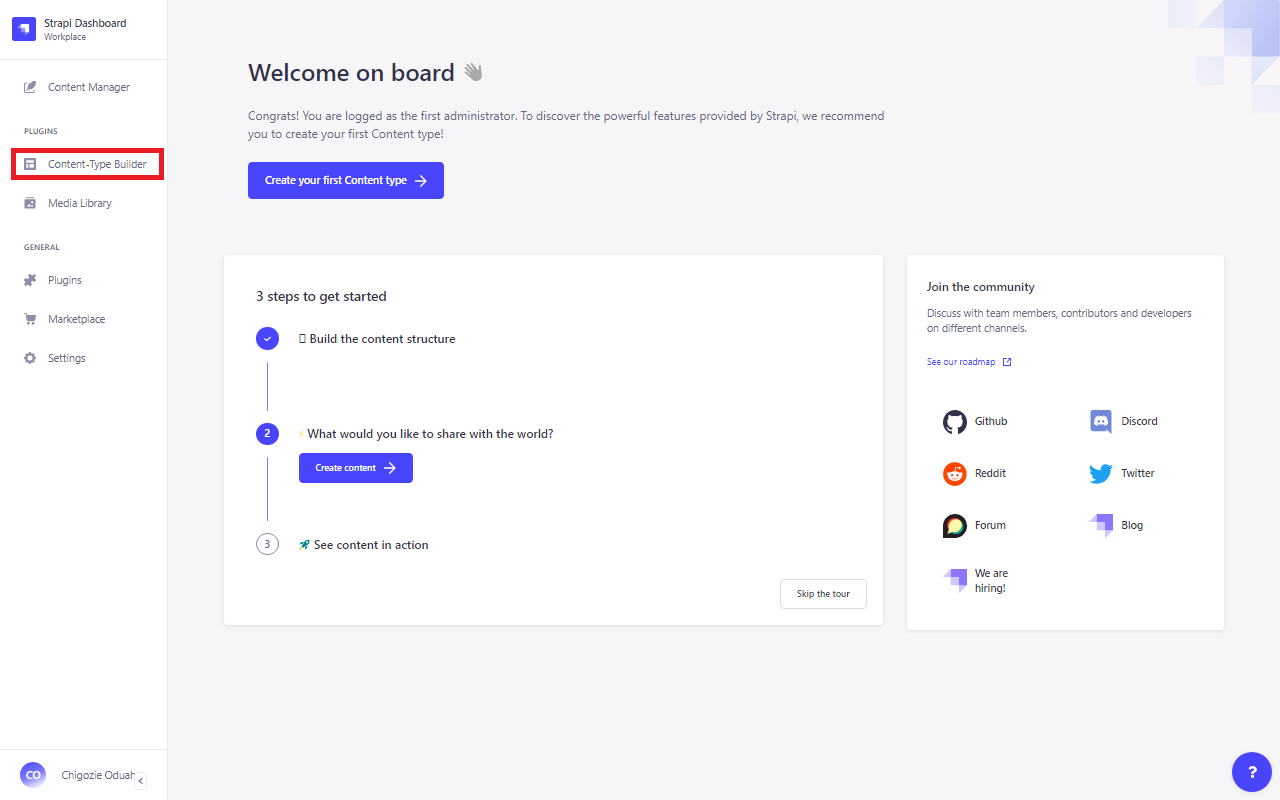
- Click on Create new collection type.
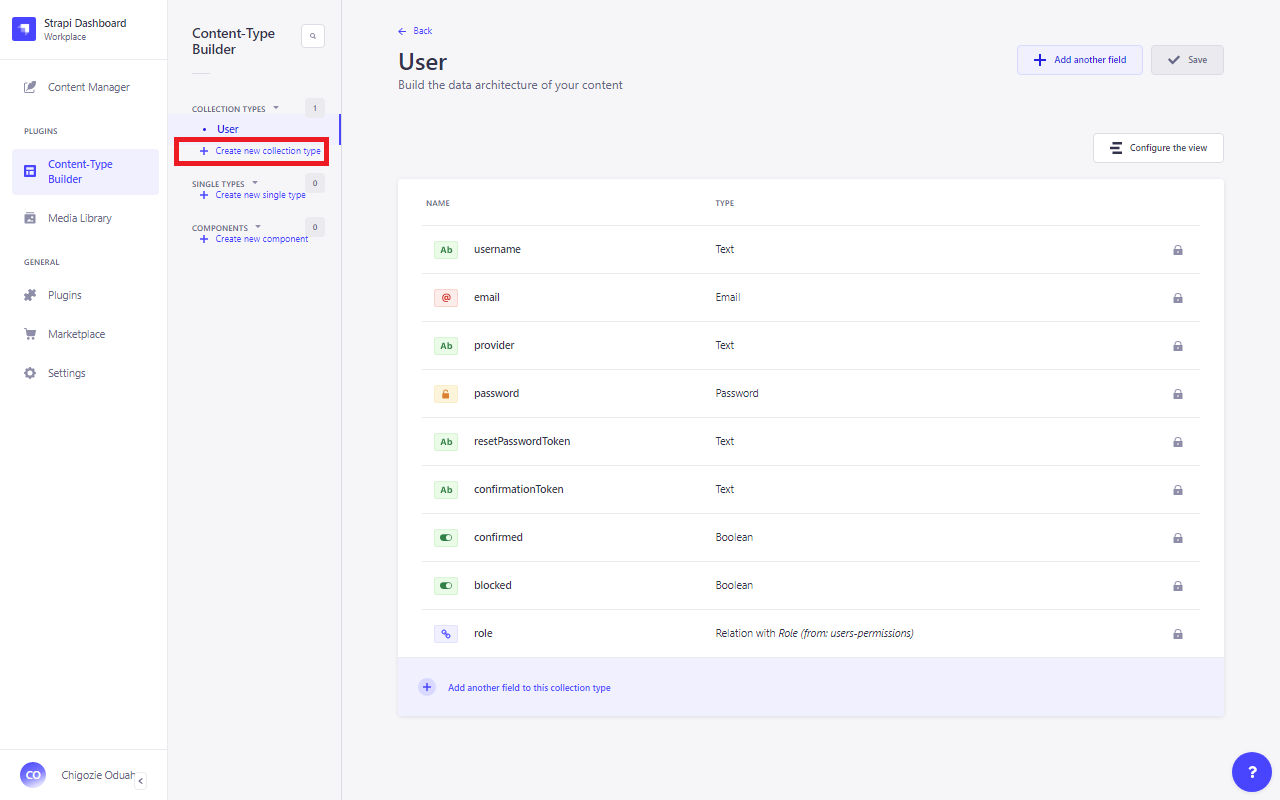
- In the prompt, name it “Todo” (or anything else if you prefer). Strapi will auto-fill the rest of the fields based on this name.
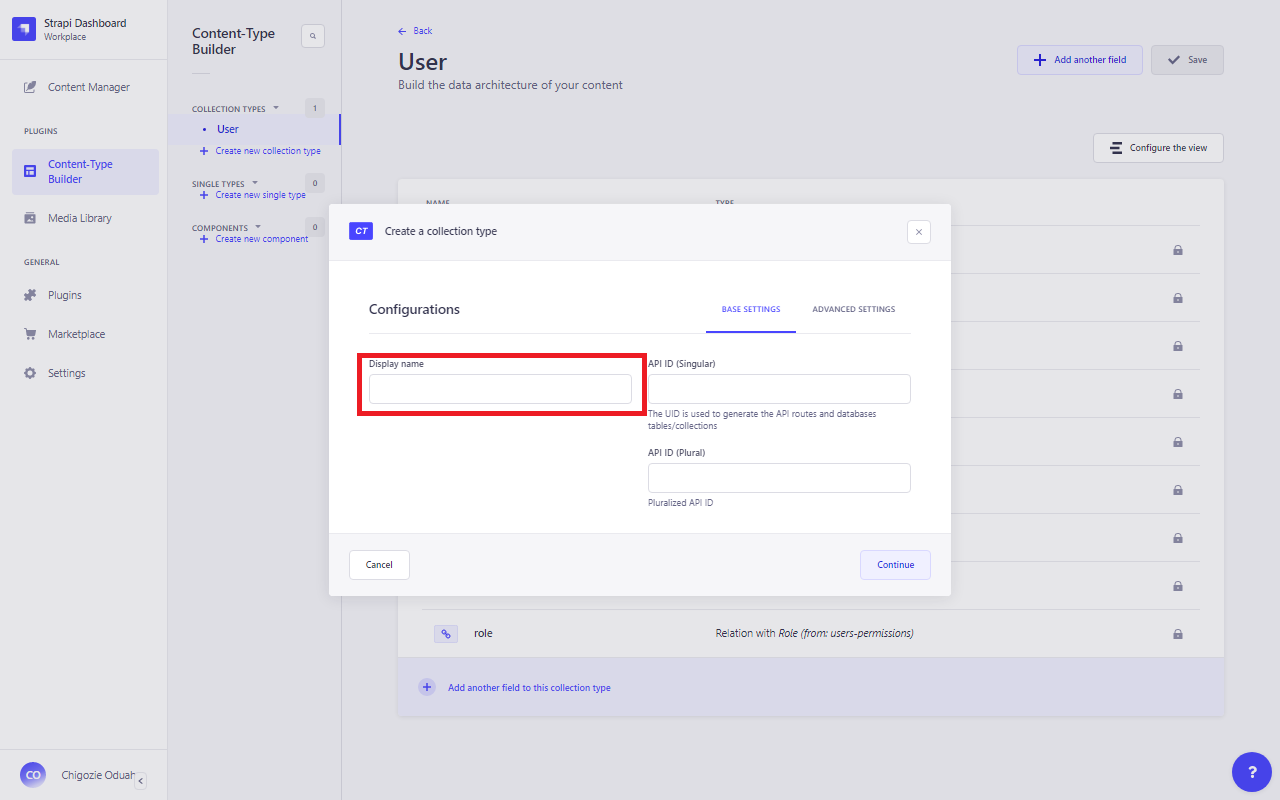
- Hit Continue to proceed.
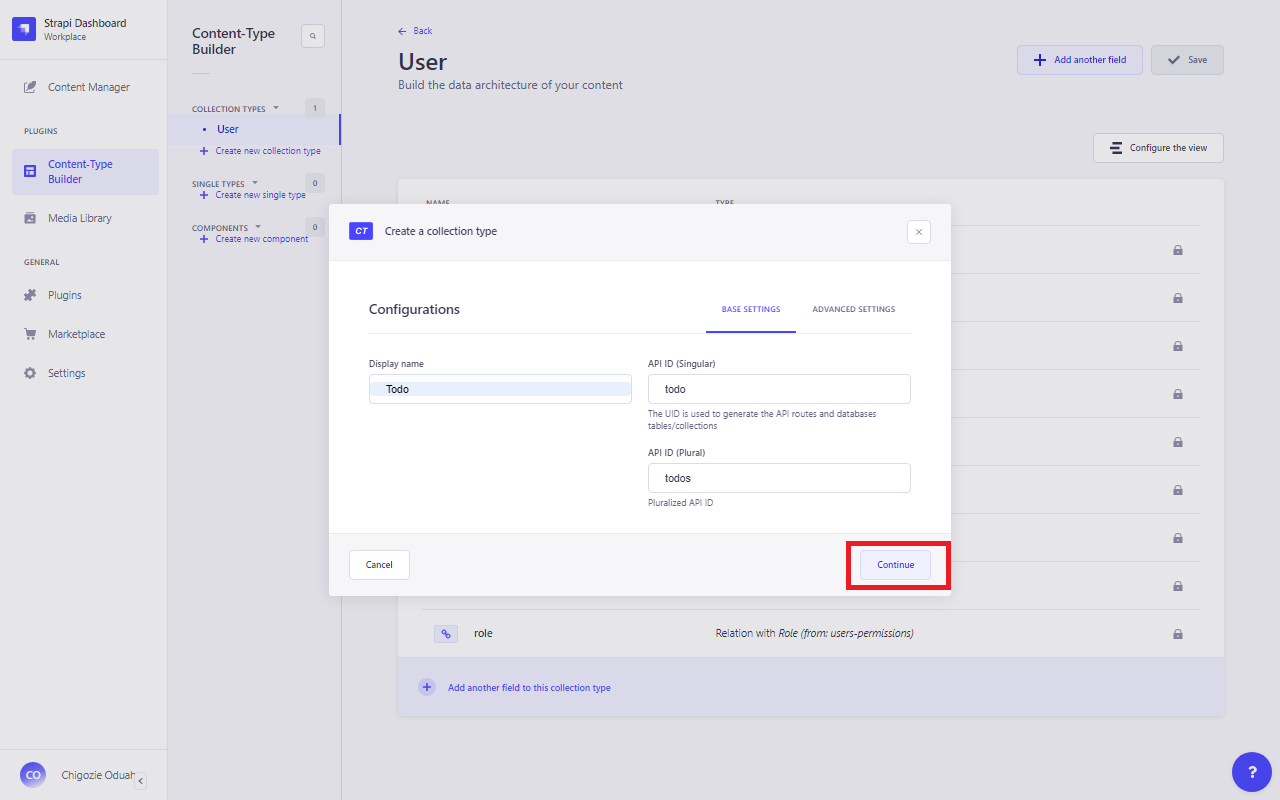
- Next, we’ll add a field to the collection.
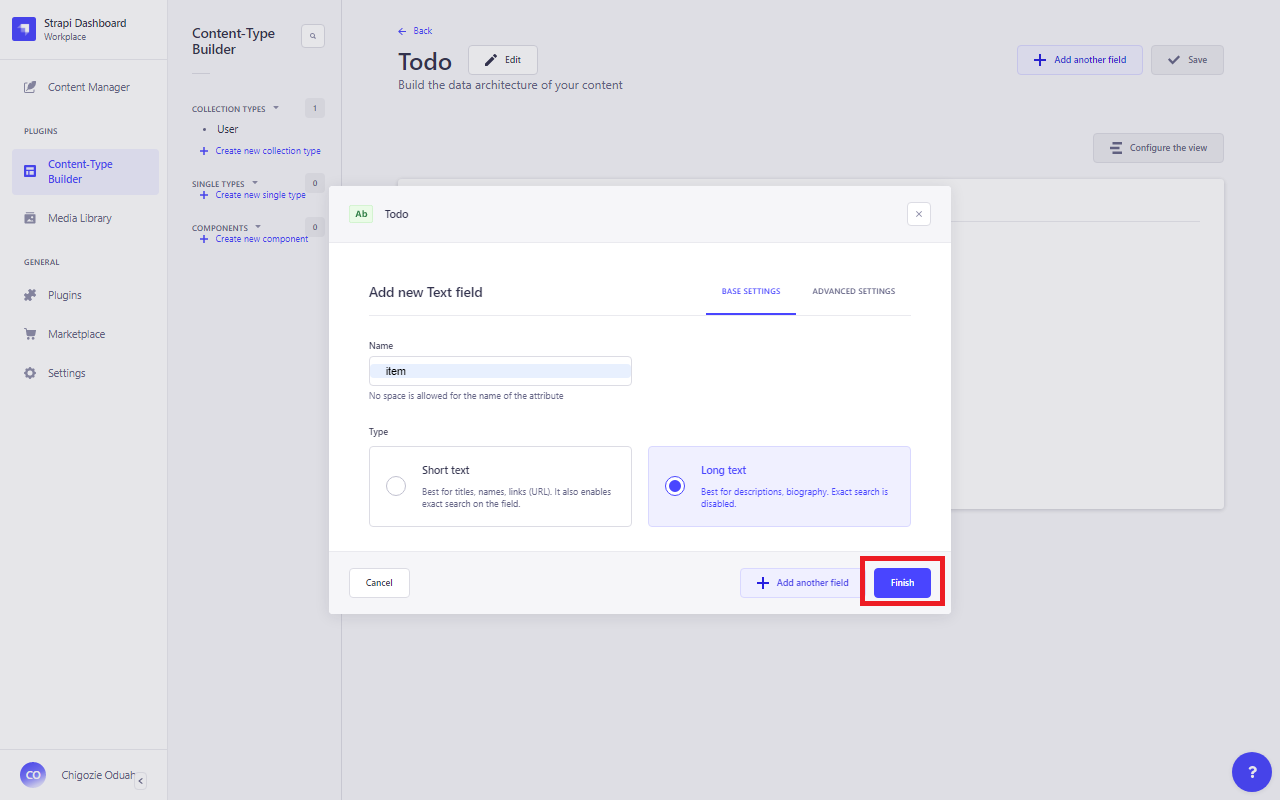
- For the to-do item description, add a text field.
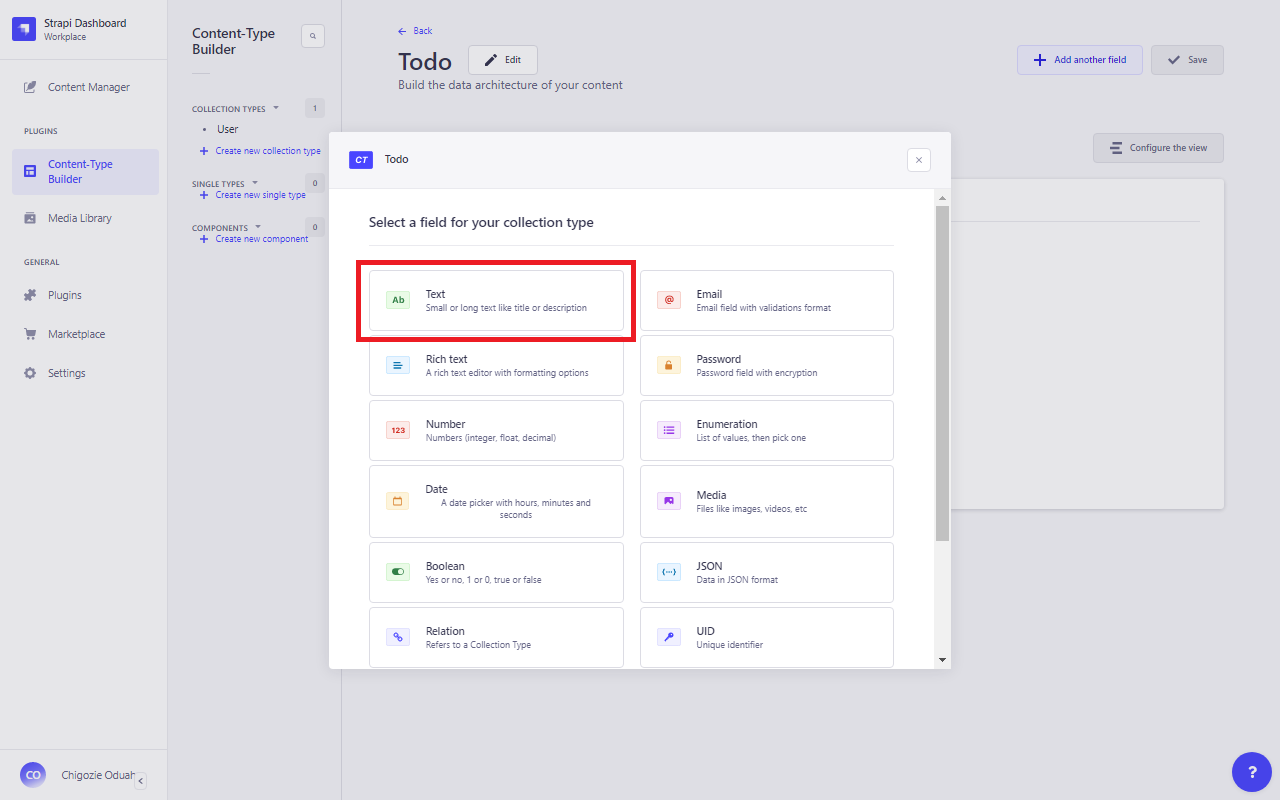
- Name the field “item” (feel free to change it) and choose the long text option.
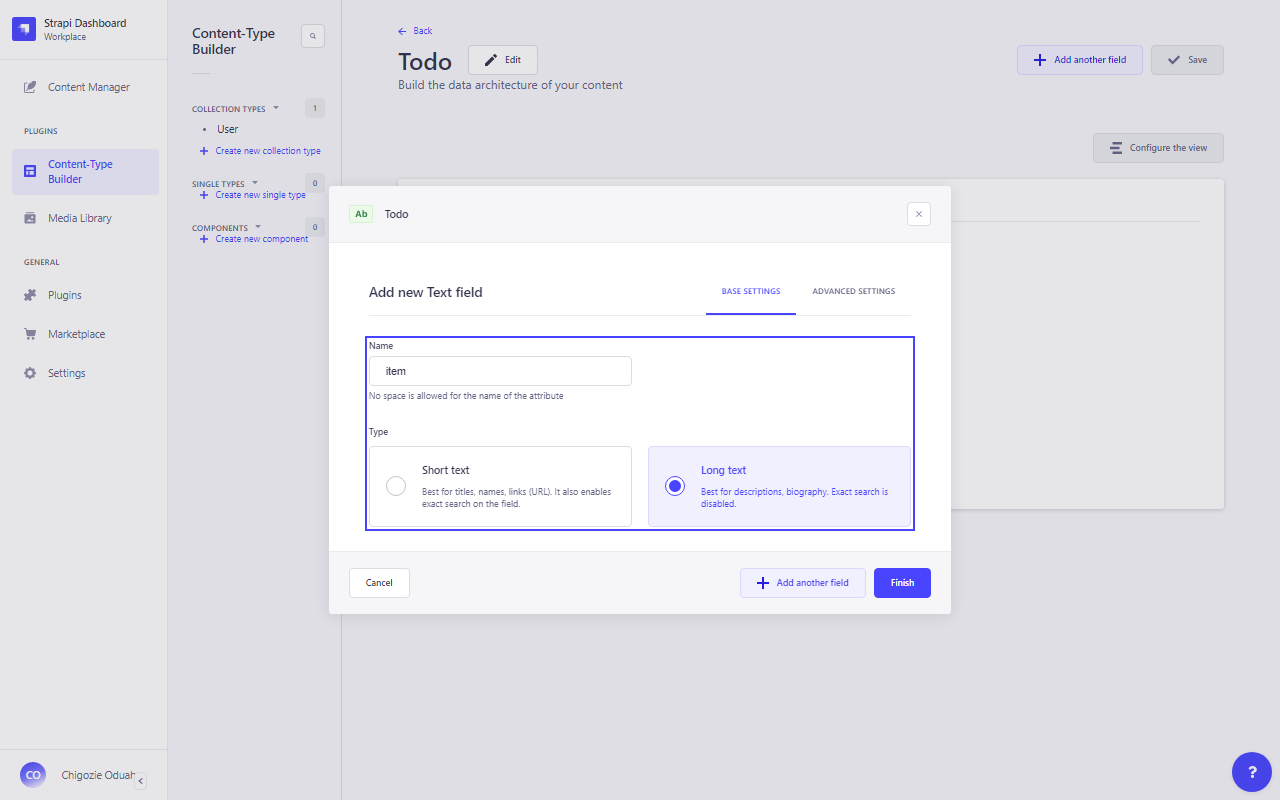
- Finally, click Finish to save the field.
- Then, hit Save to register the collection in the app.
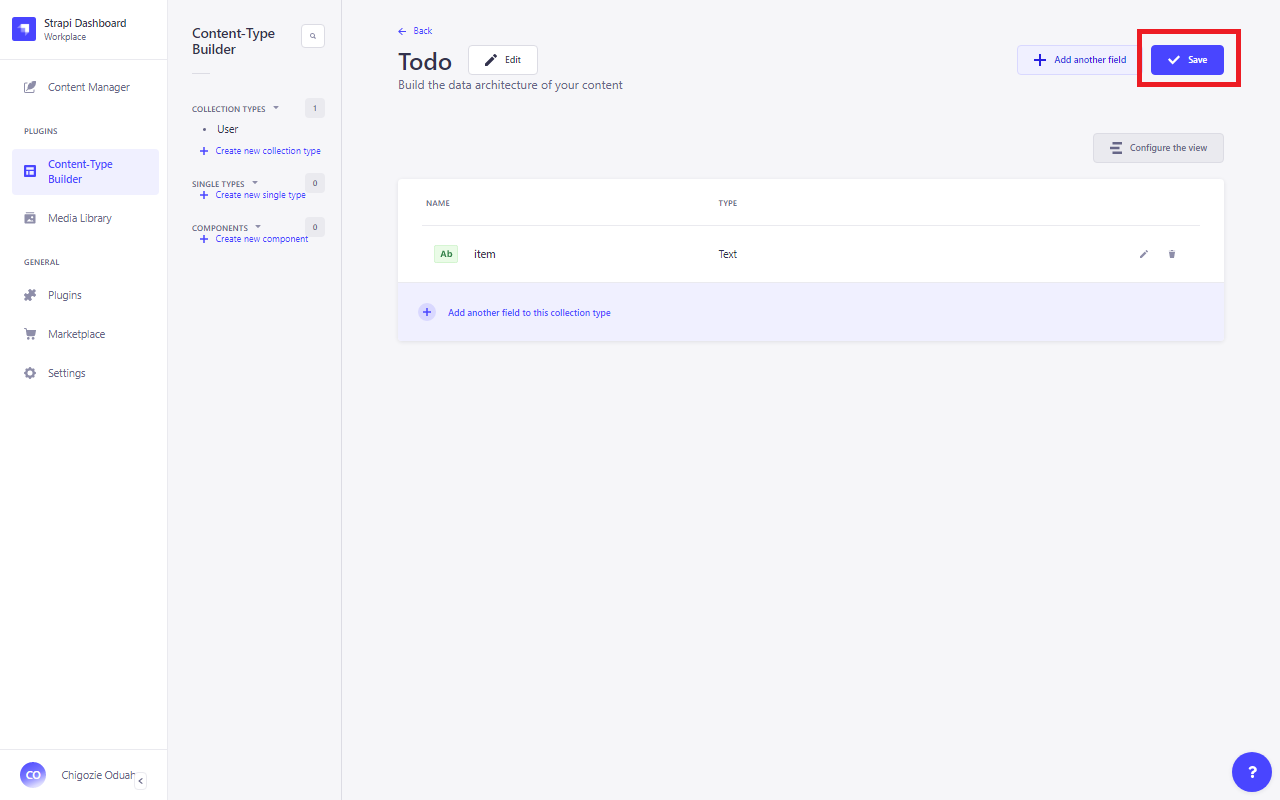
When Strapi finishes applying changes, the server restarts. Your collection is now ready for use!
Step 2: Add Test Entries
Now that the collection is set up, it’s time to add some test entries. This helps us confirm that the collection is processing data correctly. Here’s how to add entries:
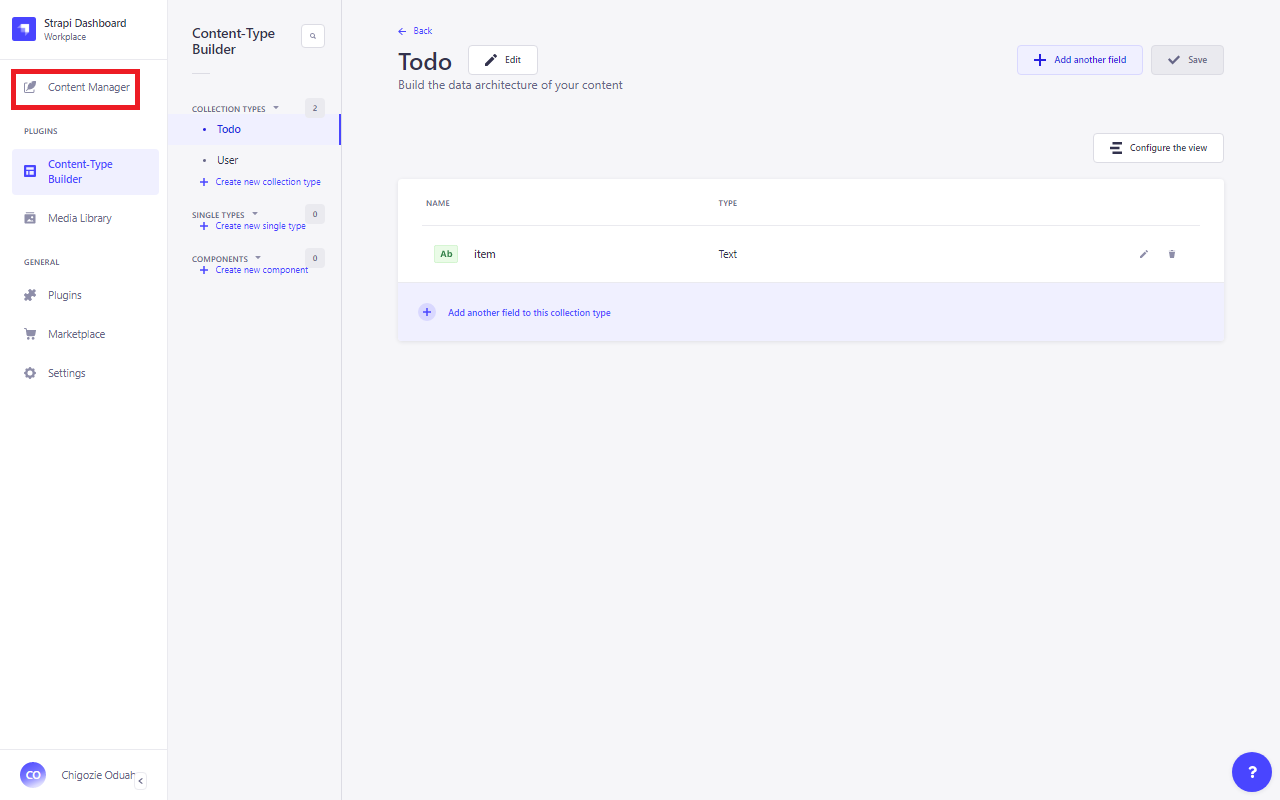
- Go to Content Manager. This is where you can manage all your collection entries.
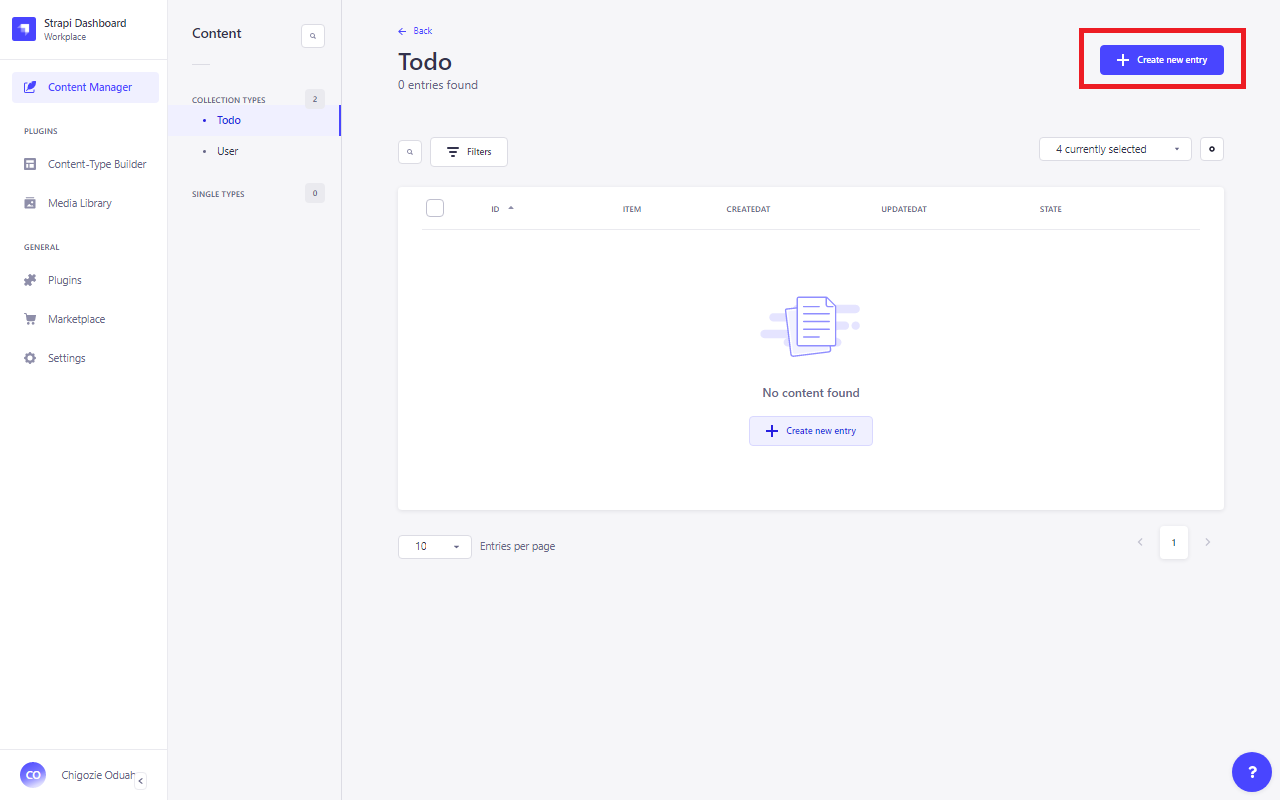
- Create a new entry under the Todo collection by clicking the Create new entry button.
- In the “item” field, enter some text.
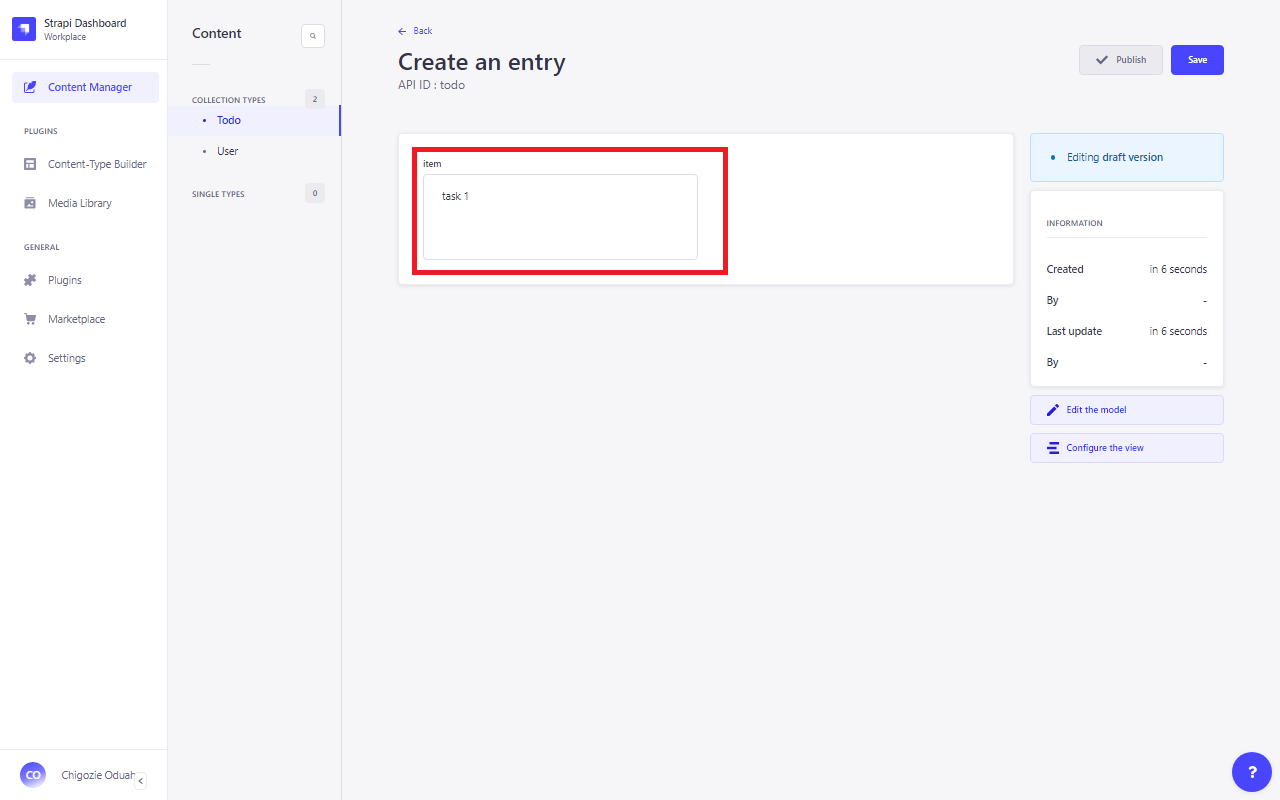
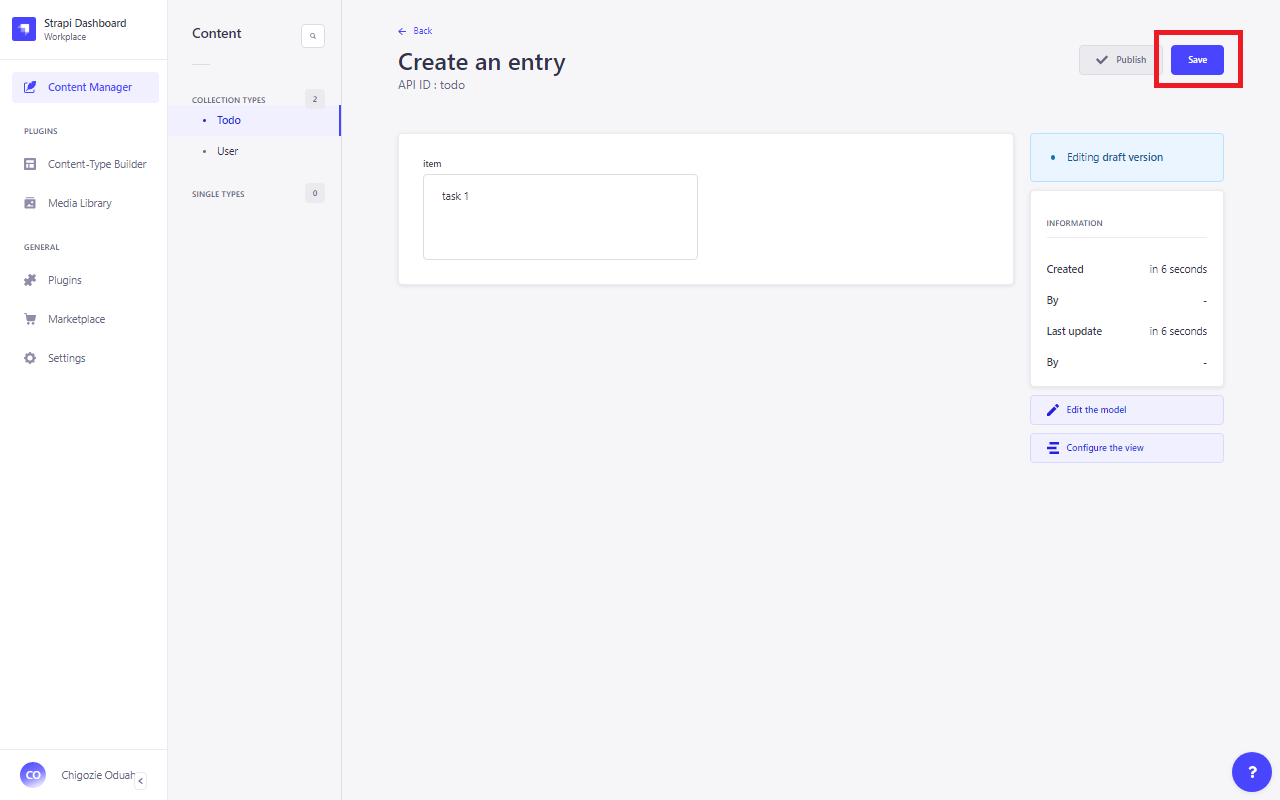
- Save it as a draft first.
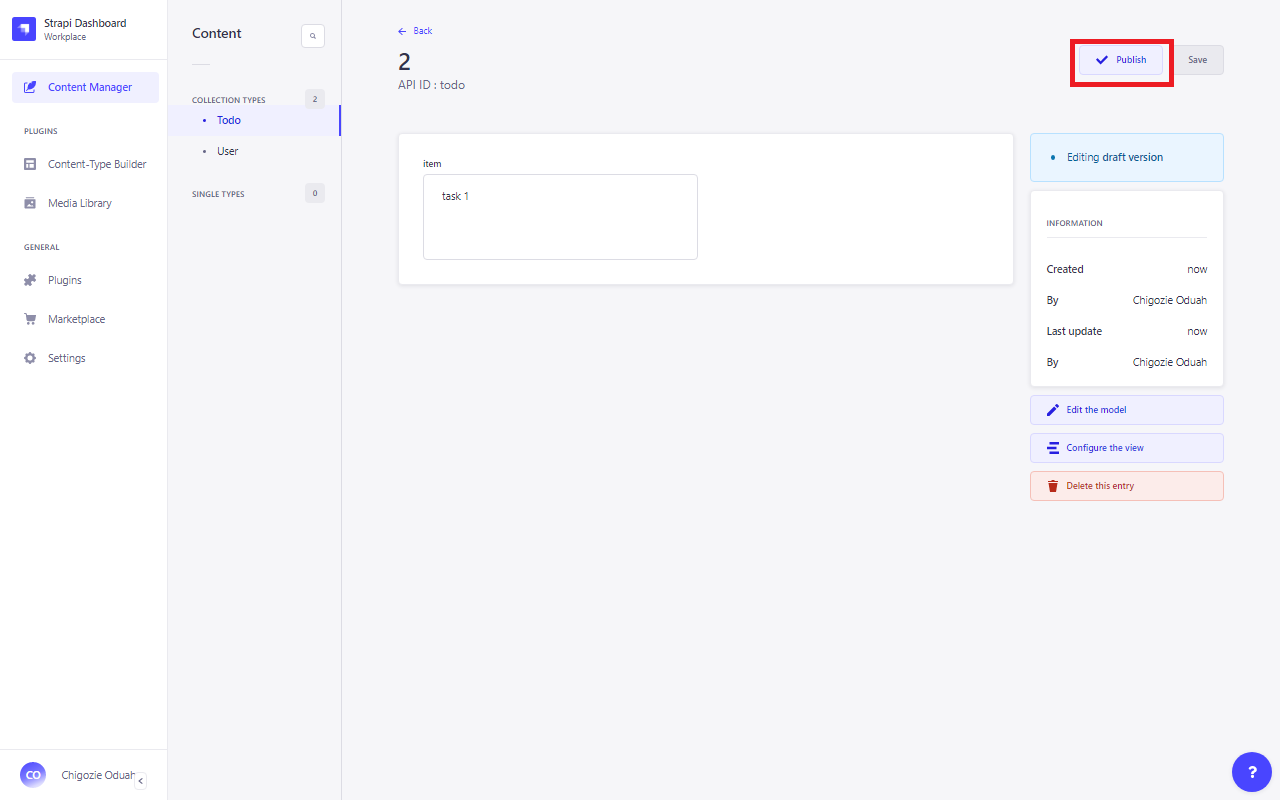
- Then, hit Publish to officially add it to the collection.
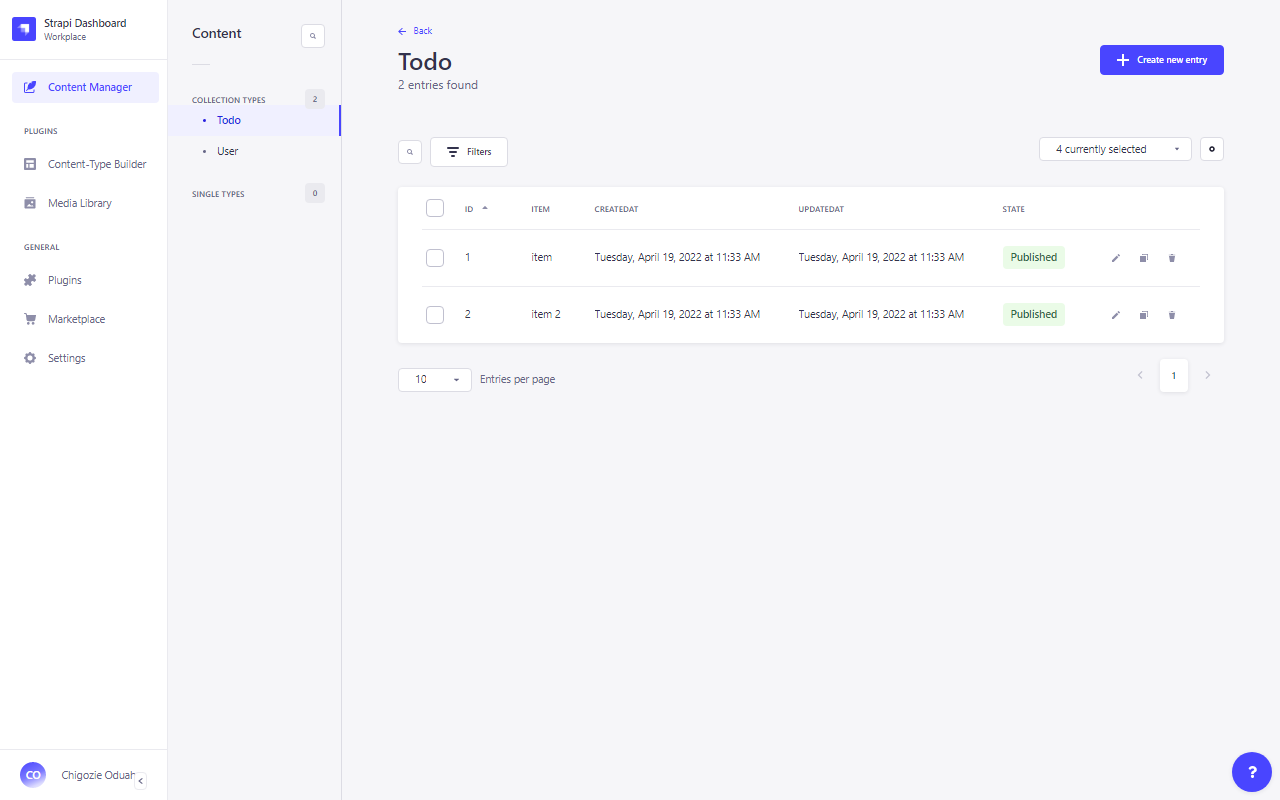
- Make sure you repeat these steps at least twice so that you have two entries in your collection. With this, you can start testing how Strapi with React handles data flow.
Step 3: API Endpoint Generation for Our Collection
Next, we create an API endpoint to connect our frontend to the Todo collection. It lets the frontend and data interact with each other. Follow these steps:
- Go to Settings under General.
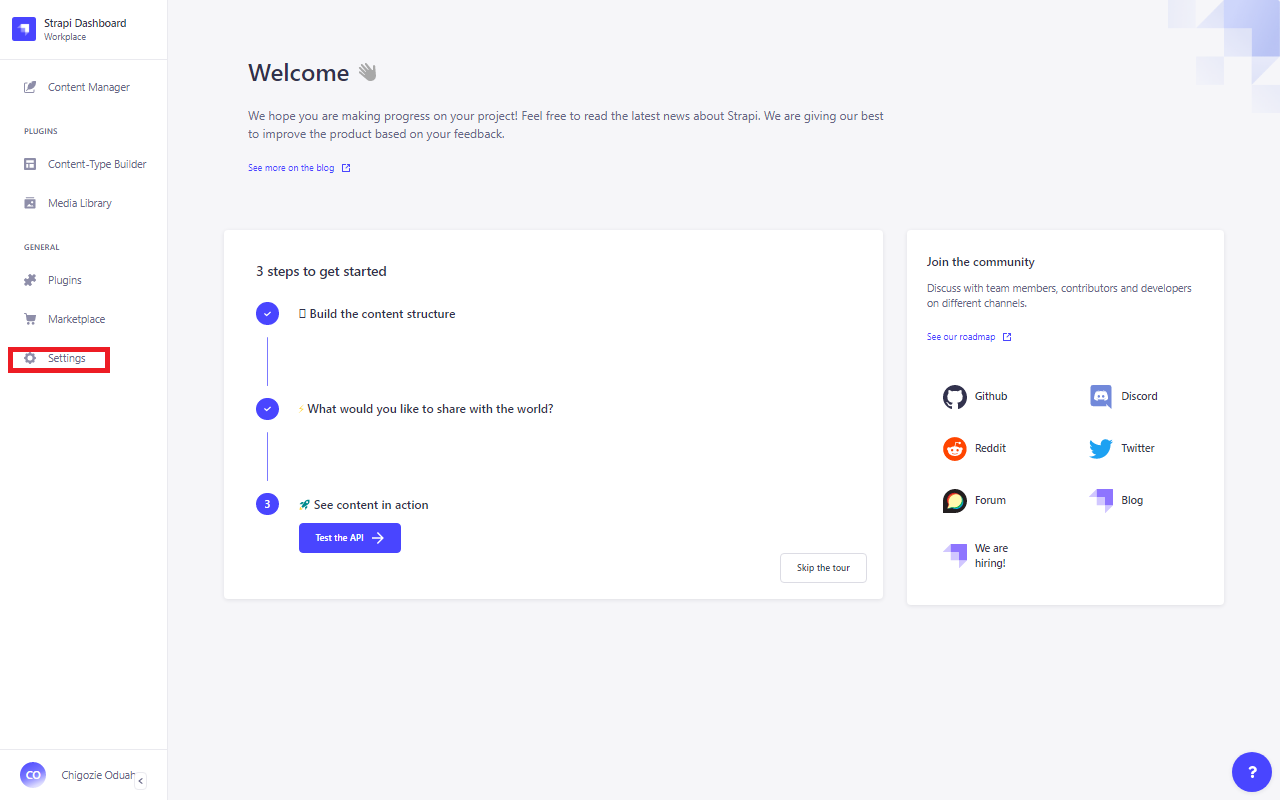
- Under User Permissions & Roles, you’ll find Roles. Click on it.
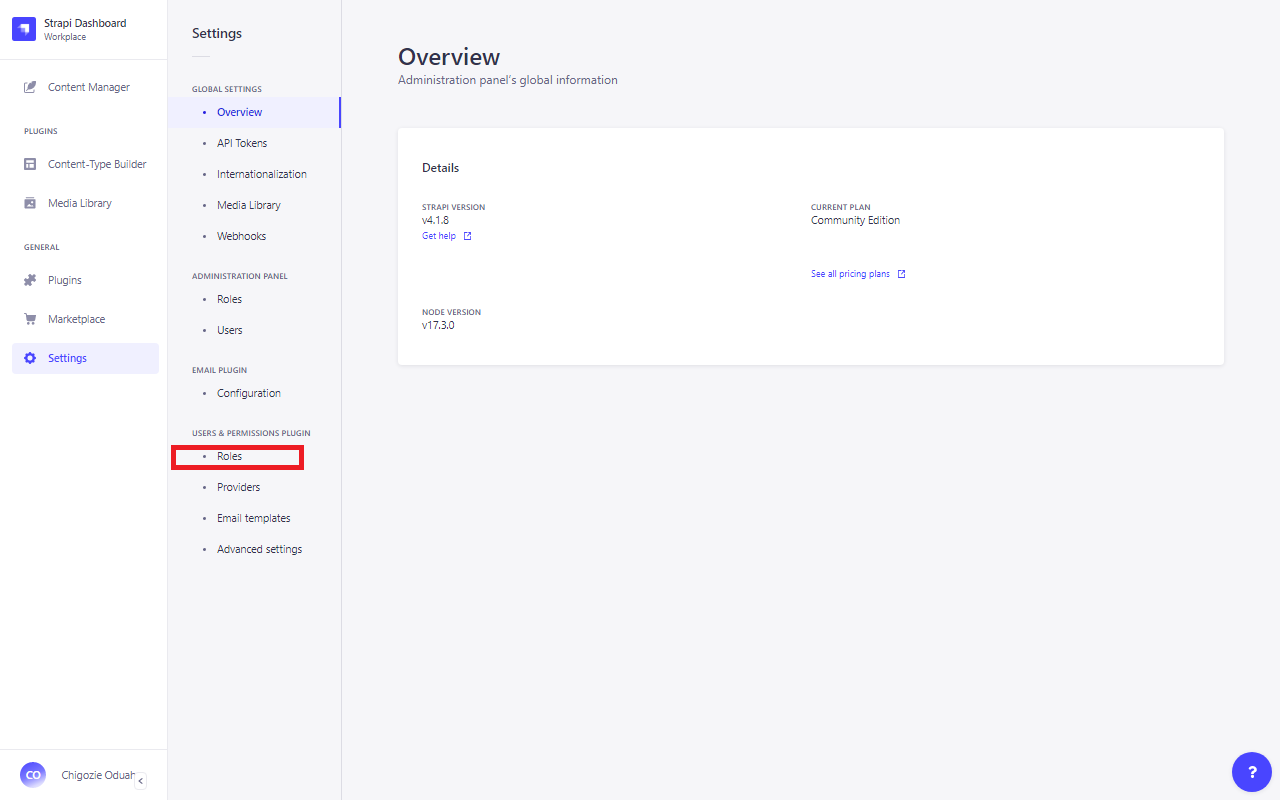
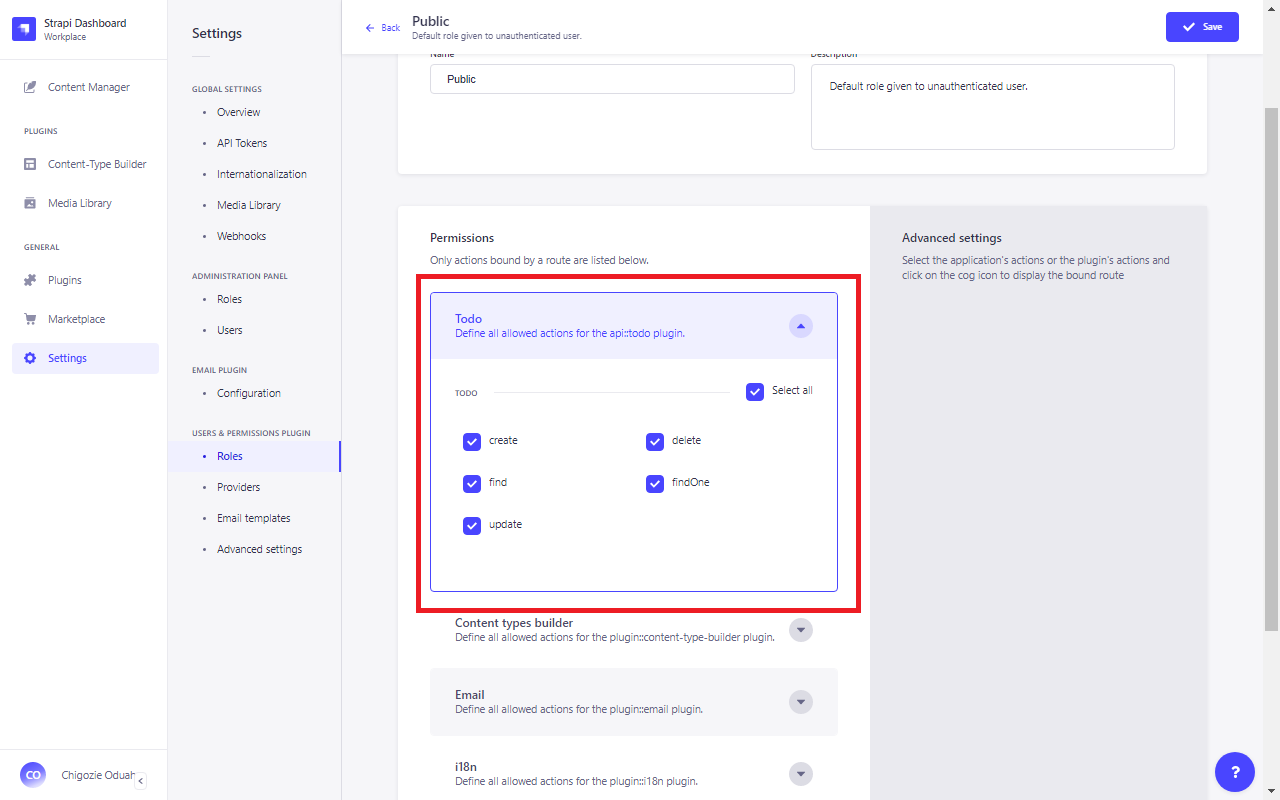
- Select Public to modify the permissions for public access.
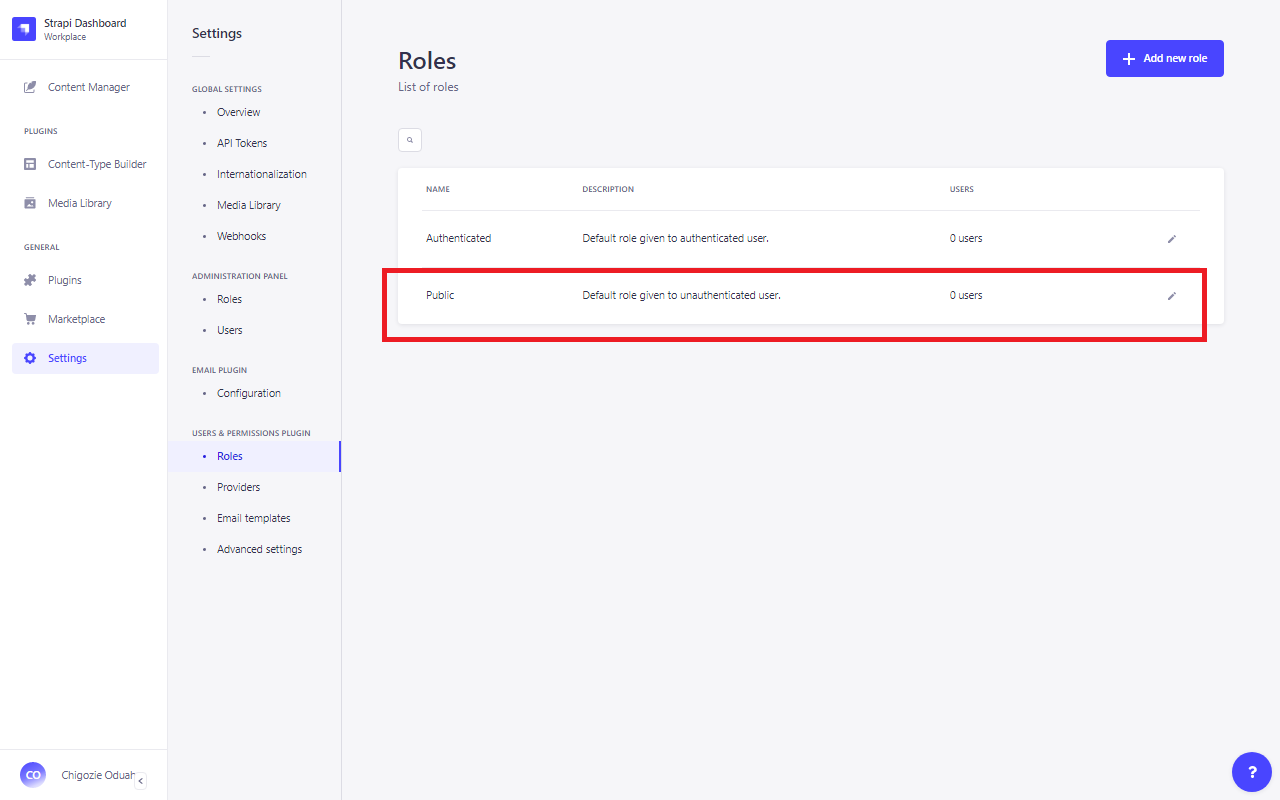
- To control access, toggle the Todo dropdown in the Permissions section.
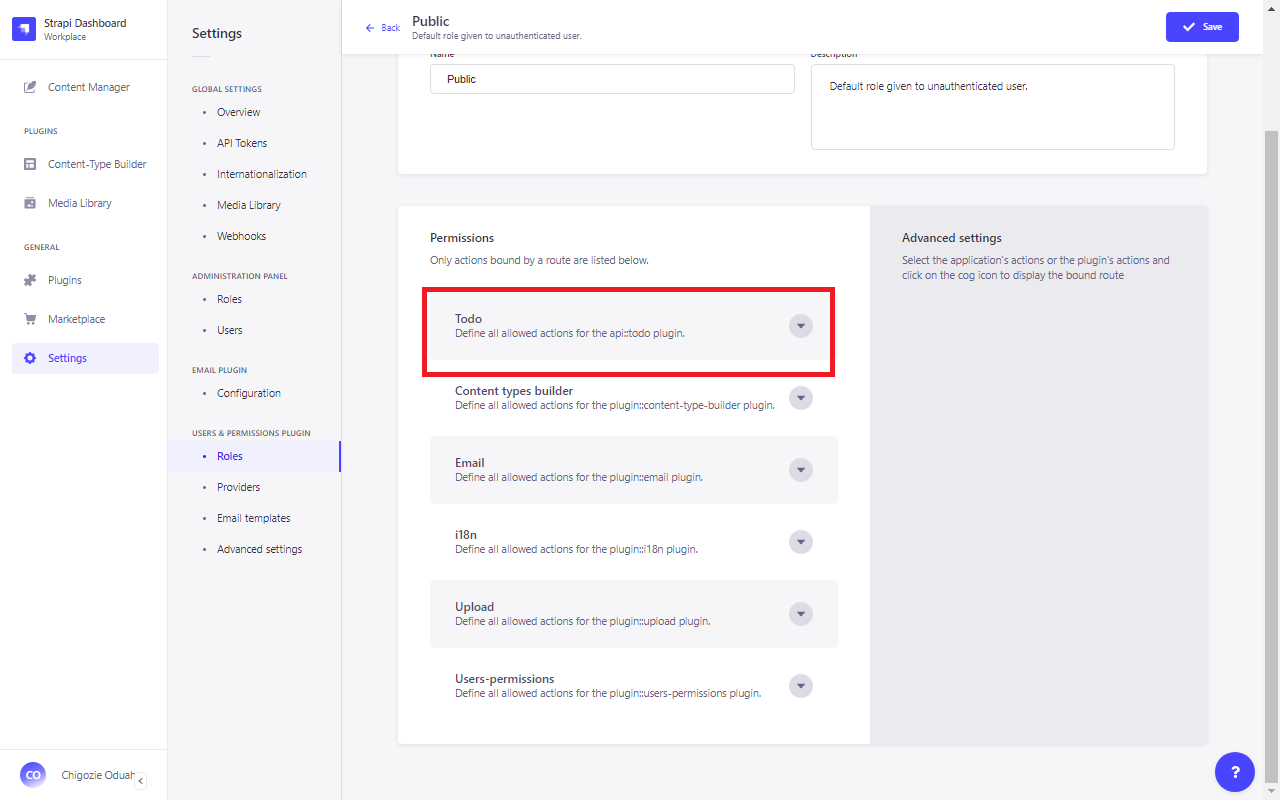
- To enable public access to the Todo collection without requiring authentication, click Select All.
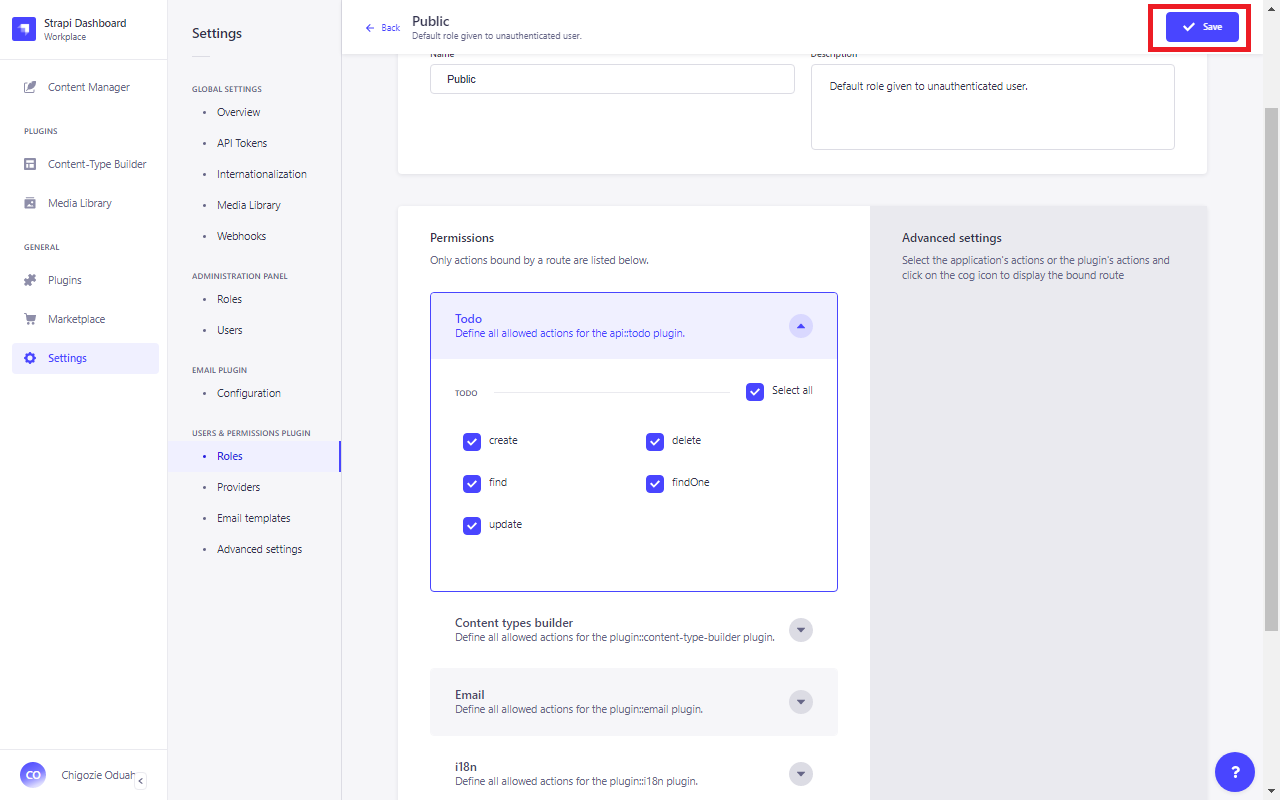
- Finally, click Save to confirm the changes.
Once done, merged Strapi with React will create the endpoints necessary to link and work with the collection.
API Endpoints for the Todo Collection
Here’s a breakdown of the key Strapi API endpoints for managing your Todo collection:
1. Find (/api/todos GET)
This endpoint retrieves all items in your Todo collection. The response will contain a list of items, as mentioned below:
```json
{ "data": [ { "id": 1, "attributes": { "item": "item", "createdAt": "2022-04-19T10:33:44.577Z", "updatedAt": "2022-04-19T10:33:45.723Z", "publishedAt": "2022-04-19T10:33:45.718Z" } }, { "id": 2, "attributes": { "item": "item 2", "createdAt": "2022-04-19T10:33:56.381Z", "updatedAt": "2022-04-19T10:33:58.147Z", "publishedAt": "2022-04-19T10:33:58.144Z" } } ], "meta": { "pagination": { "page": 1, "pageSize": 25, "pageCount": 1, "total": 2 } }
}
```
2. Create (/api/todos POST)
This endpoint lets you create a new item. For example, sending this request:
{ "data": { "item": "item 3" }
}
Will return:
{ "data": { "id": 3, "attributes": { "item": "item 3", "createdAt": "2022-04-19T13:17:36.082Z", "updatedAt": "2022-04-19T13:17:36.082Z", "publishedAt": "2022-04-19T13:17:36.079Z" } }, "meta": {}
}
3. Find One (/api/todos/{id} GET)
Use the item’s ID to retrieve a specific item. For example, calling /api/todos/2 will return:
{ "data": { "id": 2, "attributes": { "item": "item 2", "createdAt": "2022-04-19T13:15:10.869Z", "updatedAt": "2022-04-19T13:15:11.839Z", "publishedAt": "2022-04-19T13:15:11.836Z" } }, "meta": {}
}
4. Update (/api/todos/{id} PUT)
Use this endpoint to update an item. For example, sending this request to /api/todos/2:
{ "data": { "item": "2nd item" }
}
Will update the item, and you’ll get a response like:
{ "data": { "id": 2, "attributes": { "item": "2nd item", "createdAt": "2022-04-19T13:17:36.082Z", "updatedAt": "2022-04-19T13:51:06.266Z", "publishedAt": "2022-04-19T13:14:59.823Z" } }, "meta": {}
}
5. Delete (/api/todos/{id} DELETE)
This endpoint deletes an item from the collection. For instance, calling /api/todos/2 will delete the item, and you’ll get:
{ "data": { "id": 2, "attributes": { "item": "item 2", "createdAt": "2022-04-19T13:17:36.082Z", "updatedAt": "2022-04-19T13:15:11.839Z", "publishedAt": "2022-04-19T13:15:11.836Z" } }, "meta": {}
}
With these endpoints, you can easily interact with your Strapi React app and manage the Todo collection.
Setting Up ReactJS
ReactJS is popularly used to develop web apps. Easy usability of this JS framework is the reason we chose it for this guide. To set up the React app, run either of the commands below:
yarn:
yarn install global create-react-app
yarn create-react-app todo-frontend
For yarn 3 and above:
yarn dlx create-react-app todo-frontendnpm:
npx create-react-app todo-frontendOnce your React app is set up, create two files for the environment variables:
.env.development:
REACT_APP_BACKEND=http://localhost:1337/.env.production:
REACT_APP_BACKEND=/Note: The .env.development file is used for your development environment. .env.production is used for production. The setup above smoothly integrates Strapi with React app and the backend.
Frontend Development
With our React part now ready, we’ll now ready up our to-do list app’s frontend.
First, copy the following code into the App.js file:
import { useState, useEffect } from 'react';
import TodoItem from './TodoItem';
import './App.css';
function App() { const [todos, setTodos] = useState([]); const [newTodo, setNewTodo] = useState(""); useEffect(() => { update(); }, []); function update() { fetch(`${process.env.REACT_APP_BACKEND}api/todos`) .then(res => res.json()) .then(todo => { setTodos(todo.data); }) } function addTodo(e) { e.preventDefault(); let item = newTodo; let body = { data: { item } }; fetch(`${process.env.REACT_APP_BACKEND}api/todos`, { method: "POST", headers: { 'Content-type': 'application/json' }, body: JSON.stringify(body) }) .then(() => { setNewTodo(""); update(); }) } return ( <div className="app"> <main> <form className="form" onSubmit={addTodo}> <input type="text" className="todo_input" placeholder="Enter new todo" value={newTodo} onChange={e => setNewTodo(e.currentTarget.value)} /> <button type="submit" className="todo_button">Add todo</button> </form> <div> {todos.map((todo, i) => <TodoItem todo={todo} key={i} update={update} />)} </div> </main> </div> )
}
export default App;
Once this is in place, create the TodoItem.jsx file in the same directory. This component will render each to-do item. Here’s the code for TodoItem.jsx:
import { useState } from "react";
import './App.css';
function TodoItem({ todo, update }) { const [edit, setEdit] = useState(false); const [newTodo, setNewTodo] = useState(""); function changeTodo(e) { e.preventDefault(); let item = newTodo; let pos = todo.id; let body = { data: { item } }; fetch(`${process.env.REACT_APP_BACKEND}api/todos/${pos}`, { method: "PUT", headers: { 'Content-type': 'application/json' }, body: JSON.stringify(body) }) .then(() => { setEdit(false); update(); }) } function deleteTodo(e) { e.preventDefault(); let pos = todo.id; fetch(`${process.env.REACT_APP_BACKEND}api/todos/${pos}`, { method: "DELETE" }) .then(() => update()); } return ( <div className="todo"> {!edit ? <div className="name">{todo.attributes.item}</div> : <form onSubmit={changeTodo}> <input className="todo_input" type="text" placeholder="Enter new todo" value={newTodo} onChange={e => setNewTodo(e.currentTarget.value)} /> <button className="todo_button" type="submit">Change todo</button> </form> } <div> <button className="delete" onClick={deleteTodo}>delete</button> <button className="edit" onClick={() => { setEdit(!edit); setNewTodo(todo.attributes.item); }}>edit</button> </div> </div> );
}
export default TodoItem;
Next, add some basic CSS to style our app. Copy the following into App.css:
.app { display: flex; justify-content: center; text-align: center;
}
.todo_input { height: 16px; padding: 10px; border-top-left-radius: 8px; border-bottom-left-radius: 8px; border: 2px solid blueviolet;
}
.todo_button { border: 2px solid blueviolet; background-color: transparent; height: 40px; border-top-right-radius: 8px; border-bottom-right-radius: 8px;
}
.todo { display: flex; justify-content: space-between; margin-top: 5px; font-weight: 700; margin-bottom: 5px; min-width: 340px;
}
.edit { width: 66px; font-weight: 700; background: blueviolet; border: none; border-top-right-radius: 5px; height: 33px; border-bottom-right-radius: 5px; color: white; font-size: medium;
}
.delete { width: 66px; font-weight: 700; background: white; border: 2px solid blueviolet; border-top-left-radius: 5px; height: 33px; color: blueviolet; border-bottom-left-radius: 5px; font-size: medium;
}
.form { padding-top: 27px; padding-bottom: 27px;
}
.name { max-width: 190.34px; text-align: left;
}
All done. Now, when you run the app, the UI will render as expected, giving you an interactive to-do list powered by Strapi and ReactJS.
Integrating React and Strapi
To combine React with Strapi into a seamless full-stack application, we can deploy everything on a single server. Here’s how:
- Open the React project folder in your terminal.
- Run the build command to prepare your React app for production.
For yarn:
yarn run buildFor npm:
npm run build3. Once the build is complete, copy all files from the generated “build” folder.
4. Paste these files into the Strapi “public” folder.
After doing this:
- Make sure to run your Strapi application.
- Open your browser and go to
https://localhost:1337/.
You’ll have a React and Strapi merged full-stack project—ready for deployment!
Conclusion
This to-do app is an elementary Ststrapi react example. If required, newer features can be added and customized. For advanced customizations, opt for ReactJS development services.
Note: You can also use CSS for frontend instead of ReactJS as it provides much more simplicity. For critical front-end design modifications, hire ReactJS developers to resolve end-point query issues.
Frequently Asked Questions
How to use Strapi with React?
To use Strapi with React, set up your Strapi app for the backend and connect it via API endpoints. Then, fetch and manipulate the data in the React frontend. It allows easy integration of content management with ReactJS development services.
How to build a website with Strapi and React?
Start by creating a Strapi app for content management. Then, use React for web development to build the frontend, integrating it with Strapi React endpoints. This combination ensures a flexible, dynamic website with robust API interactions.
Is Strapi good for big projects?
Yes, Strapi scales well for large projects, offering high flexibility and support for ReactJS development services. With Strapi React, you can handle complex data structures and APIs. It’s a solid choice for CMS development services in big, dynamic applications.
Which headless CMS is best for JavaScript?
Strapi CMS React is one of the best React libraries and frameworks for building JavaScript apps. Its flexibility and ease of use make it perfect for React with Strapi integrations. Plus, you can hire ReactJS developers to leverage its full potential for any JavaScript project.
What’s the best way to fetch data from Strapi in React?
The best way to fetch data from Strapi in React is by using React hooks like useEffect and useState for API calls. Use fetch or Axios to interact with Strapi API and display data. This method works perfectly for React for web development.


